Over the past 2 weeks I have given a simple overview of aperture priority mode and ISO. This week I look at using shutter priority mode (TV or S on most cameras), the 3rd and final pillar of photography. In this mode you as the photographer can choose which shutter speed to shoot in leaving your camera to adjust the aperture accordingly.
What is shutter speed?
Shutter speed is the duration of the exposure, from the opening of the shutter to the closing or, in simpler terms, the amount of time that the shutter is open. It is measured in seconds. On average it can range from 30 seconds ( a long exposure) to 1/1000th of a second.
How will using this mode affect my photos?
The main impact of different shutter speeds on your photos is how movement will be captured. If you’re at a sporting event where there is lots of movement you are more likely to choose shutter priority mode rather than aperture priority mode. For example, if you wanted to ‘freeze’ a moving object you would choose a fast shutter speed (eg 1/200) but if you wanted to show how fast something is moving in your photo you may want to choose a slower shutter speed to give the object some blur.
See examples below
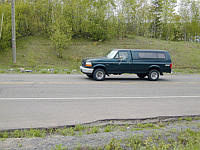
1/250 sec
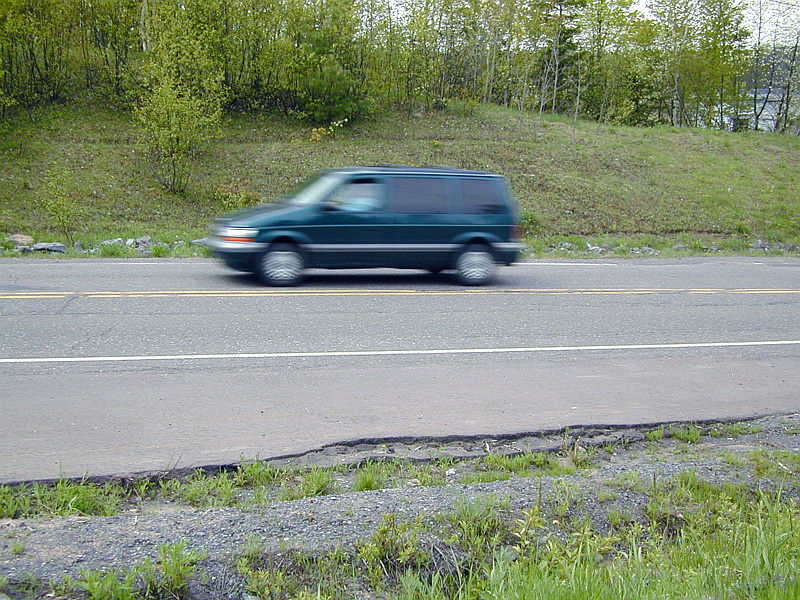
1/30 sec
The first image was taken with a shutter speed of 1/250 second. Notice how the vehicle is frozen making it look stationary and sharp. The second image was taken with a longer exposure of 1/30 second. This shutter speed has created motion blur.
Summary
Fast shutter speed = freezing a moving object Slow shutter speed = motion blur
NB If you pick a faster shutter speed so you can freeze the action the camera will pick a wider aperture to let more light in. Your subject will appear perfectly frozen with no blurs, but the background will be a little out of focus (see my earlier post about aperture). You can have a bit of control over this by increasing the camera’s ISO thereby increasing the sensitivity to light and allowing for a narrower aperture which will bring more of the background in focus.
TASK
A good way to see the effects of different shutter speeds is by photographing running water. Take a picture of some running water (ie out of a tap) with a fast shutter speed (eg 1/250) and then with a slower shutter speed of 1/30. Notice how the water in the shot using the slower shutter speed appears to be ‘flowing’ in contrast to the faster speed.
Over the past 3 weeks we have looked at the following 3 pillars of photography.
1. Aperture priority (use when shooting portraits to control your depth of field)
2. Shutter priority (use at sports events to control how movement is captured in your photos)
3. ISO (use to control your camera’s sensitivity to light)
To conclude, next week I’ll be looking at exposure compensation and metering and how these 2 things can further influence your photos